Showing posts with label DIY. Show all posts

June 11, 2014

Nursery Tour!

AKA:  "The One Where Heidi Gets All Sappy"

I've been waiting until the nursery is officially "done" to show you any pictures, but it technically won't be done until we know if we'll hang a "Q" or an "X" above the crib*.  Soooooooo, here are some pictures of progress!

Enjoy my lackluster photography skillz.

One my favorite parts of the nursery is the sweet yellow built-ins.  My parents and I SLAVED over these suckers last 4th of July and I couldn't be more pleased with the results.  So bright and chipper.  And the shelves house many special treasures. 

Here's to hoping that sleep will actually occur.

 Worry not, worriers, all blankets and animals will be removed prior to the placing of baby here.
 So happy.  We purchased black-out blinds since this room is on the southeast side of our house.  So far we've been pleased with both how cool the room stays and how dark it stays when the shades are pulled.  They're certainly not the most glamorous-looking window treatments, but they serve a very important purpose, so we're okay with the lack of aesthetic value.
 A happy rocking corner.  First of all, how adorable is the whale sound machine?  I die a little every time I look at it.  Claim to fame:  one of my colleague's sons is a designer for Homemedics and he designed it!  So that makes me kind of a big deal.
 And how about a close-up of this chair!?  This chair's former home was the basement of my mother-in-law's house.  It belonged to Danz' grandma and we snagged it over Christmas.  THEN I had a friend of mine recover it with this gorgeous fabric from Shlobby Bobby.  (Andrea, if you're reading this, please know that I am forever grateful to you for your work on this chair.  It. Is. Perfect.)  The chair is a swivel/glider/recliner and we already have spent some quality time breaking it in.  In fact, I'm sitting in it as I write and daddyDan uses it in the morning before work. 
 The lamp was a sore subject for a few weeks as I purchased several that did not pass daddyDan's lamp test.  After many heated conversations, we landed on this one, and I'm decently satisfied. 
 Sentimental moment:  My grandma Vogt (mom's mom) knitted both these blankets.  The yellow one was my baby gift 27 years ago and the green one is baby C's.  The yellow one smells like my parent's house and the green one smells like my grandma - both smells are so comforting and remind me of home.  While grandma has 8 grandchildren, she only has 4 great-grandchildren (5 including baby C), but she has a stash of great-grandbaby blankets because she knows that once they start coming, they'll come in droves. :)  I think this blanket has been done and ready for a baby since my wedding!  Can't wait to wrap our little stinker in it. 
 Most parents buy their babies sweet puppies or adorable bears or cuddly bunnies.  Not these parents!  DaddyDan says we're "fun people" so we need to buy our babe a fun animal.  I kid you not:  he narrowed it down to a bald eagle, a donkey, and a buffalo.  I was disturbed by the bald eagle, the donkey had long fibers and a tag cautioning from using it with an infant.......so the buffalo won.  It'll give us a chance to teach babe about Kansas, so I can get behind that.
 Danz does not love this picture, but it is one of my most treasured possessions.  The year we moved to Abilene (holla 1994!), my mom gave this to me for my birthday.  I love the idea of the kids being guided and watched as they walk over treacherous water.  You better believe this sucker is staying in the nursery. 
 Another angle of the cheerful shelves.  If you gave me a book at any time in the past 9 months, you better believe it's on a shelf!
Babe's friends.  They will be instant besties. Especially the snuggly buffalo.

So that's that!  If I'm really on my A-game (let's be honest, I never am), I'll post pics once some art is gracing the walls.

*I got you so good.  Baby's name beginning with a "Q" or a "X"?  Hahahahaha, no.  Or maybe yes.  Hmm, only time will tell!!

July 15, 2013

House Stuff (and stuff)

***Disclaimer:  when I spend large amounts of time away from people (aka: summer), my humor apparently distorts and I do weird things like tell you about my conversation with my front door.  You've been warned.  Carry on.***

How's that for a descriptive title?  I bet it makes you all excited.  Will this be about her patio?  Ooooo, what about her new-to-her piano?  Or even Daniel's mower saga?????  The possibilities are endless!!!!

Well, friends, this is about littlish changes I have made since the old house tour of May 2013.  But, before you read on, if you are a female and you live in or near Topeka, please take a moment to read this.   I trust you did that.  Let's move on.

So I've been waiting to show you a few things until some spaces are perfect.  But, let's be honest, no space is ever perfect or done, so let's just call these pics progress.  

You may or may not remember this vignette from the May house tour.  The lamp was disturbingly awkward....recall?  So a series of events occurred (the details would probably bore you to tears).  Let's just say that my mom bought me this lamp.  Fun, huh?  And I'm in the process of trying to regrow some sweet potato vines (mom, I noticed today that some roots are formed.....what do I do next?). 
 Still a happy corner.  I've never been crazy about red in my home, but since this dresser was my very first project (5 years ago? 6 years ago?), I can't bear to think about repainting it (shocker, I know).

Side note:  if you follow me on Instagram, you know that we bought a piano from our Alma Mater for a steal.  Upon it's arrival home, Daniel asked me if I was going to paint it.  After gasping in horror for 10ish minutes, I flailed around and hollered "No!"  He was legitimately surprised.....I suppose after you paint every surface in your house [(including kitchen cabinets, bathroom vanities, office built-ins, Craigslist furniture, and every wall (some more than once)], you build a name for yourself.  Note to self. I digress. 
 Love me some burlap. 
 SIL Tammy found the idea somewhere on the interwebz to put a few small things in a small foyer.  So we did!  Daniel thinks they're silly, but he thinks 75% of my never-ending-always-looking-for-something decor tweaks are silly.  The chevron-esque basket functions as a holding point for things that need to go upstairs.  And the price tag is still on my TJ Maxx clearance faux plant.  Super. 
 OMG.  Almost forgot to mention my stripes!  Holy knees-throbbing-back-aching stripes.  Totes worth it, but picture me saying "oh my woooooooord" 500 times during the process.  Yes.  Five hours of taping (an old house = walls that aren't square, so the use of a level is pointless). 
 And my yellow front door!  Every time I come downstairs, it says, "Well hellooooooooooooo Heidi!  I'm feeling mighty fine today!!!"  And I respond, "Hello old door.  You only took half a morning to paint, so I approve of your emotions."  And Daniel says, "She may be cray, but I love her anyway."
 Just for kicks, here is a close-up of the stripes.  I read a few tutorials first and then made up my own tutorial.  My own tutorial is a-comin!
 But for now I'm just going to relish in the happiness that is our foyer.......and then I'll start thinking about painting above the chair rail.  I believe I'll be enlisting help for that one.
 I updated this cute little lamp that I've had for a decade and bought at a thrift shop.  A different lamp shade can really liven up a sad little lamp.  Oh look, there's my piano!  With a mass of accessories atop.  Someday I'll address that.  
A project that has been brewing for quite some time is window treatments in our family room.  For my birthday, yes, 3 months ago, I asked for fabric.  Long story short, this fabric came from a teeny-tiny fabric store 5 miles south of Canada in a little town in Washington.  Ah, the interwebz. 
 I'm not 100% thrilled with the way they turned out (I get all perfectionistic when I make things like this), but I'm just living with them for now.
 I really wish they had more depth to them, so I'm thinking about making some faux ties in a deep gray color or attaching a border to draw the eye up.
 We shall see.  In the meantime, here is a close-up of the fabric.  It's sort of blue-grayish with deep yellow flowers. 
 Oh yes, and my MIL bought a new ottoman for her house, so we took her old one off her hands.  And, of course, I painted it.  Was not thrilled with how it turned out, but my SIL suggested that I go over the white with a glaze (when we got it, it was black) to add some depth. 
 Lest you think my house is always this picked up, allow me to turn 180 degrees.  What can I say?  We do a lot of living here. :) 
Also, with school starting in less than a month (picture me sobbing uncontrollably like a small child), our house projects will certainly start to dwindle.  Oh the beauty of summer.  It's fun while it lasts.

Next up - stripe tutorial!! 

July 26, 2012

Paint! And Stuff.

We appreciate a dollar saved.  A lot.  I mentioned a few days ago that we saved hundreds of dollars by painting the pulls.  So even though we ordered new hinges (remember, so yours truly wouldn't cringe each time a door was opened due to the scraping of paint), we scored a killer deal and saved boat-loads.

So if you're looking to make a quick update to your kitchen, bathroom, or dresser, don't purchase new hardware - paint it!  Our new best friend is Rustoleum spray paint.  We used Hammered Silver for the kitchen pulls.

 Several coats later and we had a nice "hammered" look. 
 For about a gazillion other little projects, we've been using Rustoleum Metallic.  The silver below is not what we used, but I apparently misplaced the correct color.  While the Metallic Silver is nice (we initially planned on using it on the kitchen pulls), we decided that the sparkles would look cheap.  So even though our method was cheap, we didn't want it to look it.
 Metallic Oil-Rubbed Bronze.
On a whim, Daniel taped off the bathroom faucet and gave it a few quick coats.  I'm fairly certain we saved at least $100 with this mini-project.
  
 Finally, to update one of our sweet little white chairs, I gave it a quick coat of sunny yellow.
 Pre-painting.
Sweet little yellow chair.
So cheery.
With only a few days of summer left, who knows what other mini-projects I'll be tackling.  Any suggestions?

Happy rainy day!

July 25, 2012

Painting Kitchen Cabinets: Part 2

Here are the nitty-gritty details of how we painted our kitchen cabinets.
 First, the process that DIDN'T work.  I had spent 7 months researching the process, and I really felt like what I nailed down was going to be great.  Not so much.  Here is what mom and I did for 2 days:
1.  Sand doors and frame (using electric sander)
2.  Use liquid sandpaper to wipe down all doors and drawers (also called deglosser)
3.  Latex primer - Benjamin Moore Advance Water Alkyd Primer - tinted to "Distant Gray" - this is when we realized that our method was not working.  (Due to my intense frustration, I took no pictures of this process.)  Here's what happened, in words:  not only was the grain of the wood showing through, but it was showing through yellowed.  Yuck and yikes.  And no amount of latex primer would cover it up.  We tried a stain-blocking latex primer, and it still didn't work.  There are several reasons why our method failed us.  First of all, the areas that we didn't degloss (because we plum forgot) were especially stain-happy.  However, even the doors we had deglossed were riddled with stains.  The bottom line is that a latex primer does not cover stains.  After 3 coats of latex primer on many of the surfaces, I crawled back to Benjamin Moore and admitted that I needed to purchase the oil-based primer.  They kindly obliged and even gave us a new process to try.
 SOOOOOOO.......this is the final process we used to paint the kitchen cabinets.  Thankfully we broke the space into two areas - the island and the desk were part A and the rest of the cabinets were part B.  So the only space that we painted a gazillion times was part A. 
1.  Remove all doors and drawers (we kept the drawer fronts connected to the drawers - it made it tremendously simple to paint the drawer fronts)
2.  Remove hinges and pulls (we later decided to purchase new hinges and paint the pulls)
3.  Liquid sandpaper (deglosser) - after listening to the advice of my new Benjamin Moore besties, we opted not to sand part B of our kitchen.  I was nervous about it at first, but not only did it remove a step, but the deglosser really did function as liquid sandpaper.  We used paper towels to degloss every surface.  It's important to note that the deglosser "opens" the grain of the wood and allows the grain to accept a primer, so the "window of openness" is relatively short - 3-4 hours at most.
4.  Oil-based primer - Benjamin Moore Cover Stain Primer - we probably should have done 2 coats, but we only did 1.
5.  Latex paint - Benjamin Moore Advance Water Alkyd Satin in "Distant Gray."  Paint one side of the doors, paint the frame, flip the doors and paint the other side.  We completed this process 3 times.
6.  Cure, cure, cure, cure, cure.
7.  Paint pulls - we used Rustoleum spray paint in "Hammered Silver" - Daniel sanded and washed each pull and them gave each 2 coats of the spray paint.  After allowing the pulls to cure overnight, we reattached them to their respective doors and drawers. 
After allowing the recommended 72 hours to dry, we reinstalled everything.  If you look close at the picture below, you can see that we scraped about 4 inches of the popcorn around the top of the desk so we could adequately paint.  We will eventually scrape all the nasty popcorn, but for now, we scraped only where necessary.
 Take-aways:
  • Do your research, but recognize that your plan might fail.
  • What worked for someone may not work for you.  Your process should really vary depending on your cabinets.  When I painted the vanity in my bathroom earlier this summer, I didn't run into any of the issues that I did when painting the kitchen cabinets.
 
Downstairs bathroom vanity

  • Oil-based paint is smelling and sticky, but it does work. Just buy a few cheap brushes and throw them away post-painting.  
  • Don't cut any corners - if you think it needs another coat, give it another coat.  It will pay off in the long-run.
  •  Allow plenty of time to cure.  You'll kick yourself if you reinstall only to find out you bumped a door while installing. 


Whew, that's it!  Total time needed to complete - 2 weeks (including curing time).  The project is not for haters of messes and/or painting, but if you can dedicate a handful of hours each day to painting, it will be worth it.  I never would have attempted the project during the school year.  Thankful I did it, thankful it's done.  Ha.


And just to keep it real, here is what our kitchen looked like during the process:
 Oh my.
 It was a long two weeks.  Lots of eating out.
Stop by tomorrow for a few decorative updates!  Happy painting!

July 24, 2012

It's DONE!!!!!

Almost.

There are perhaps 3 things left to do before I can fully admit that the kitchen is finished (for now), but I just can't wait any longer.  We're SO pleased with the results.  And so sleepy.

But before I show you the dramatic results, here is where we began.  And when I say "began," I mean before we even moved in.
 Holy honey oak!!  (As I've mentioned before, honey oak is not the worst thing on the planet...but it is simply not our style.)
 It's everywhere. 
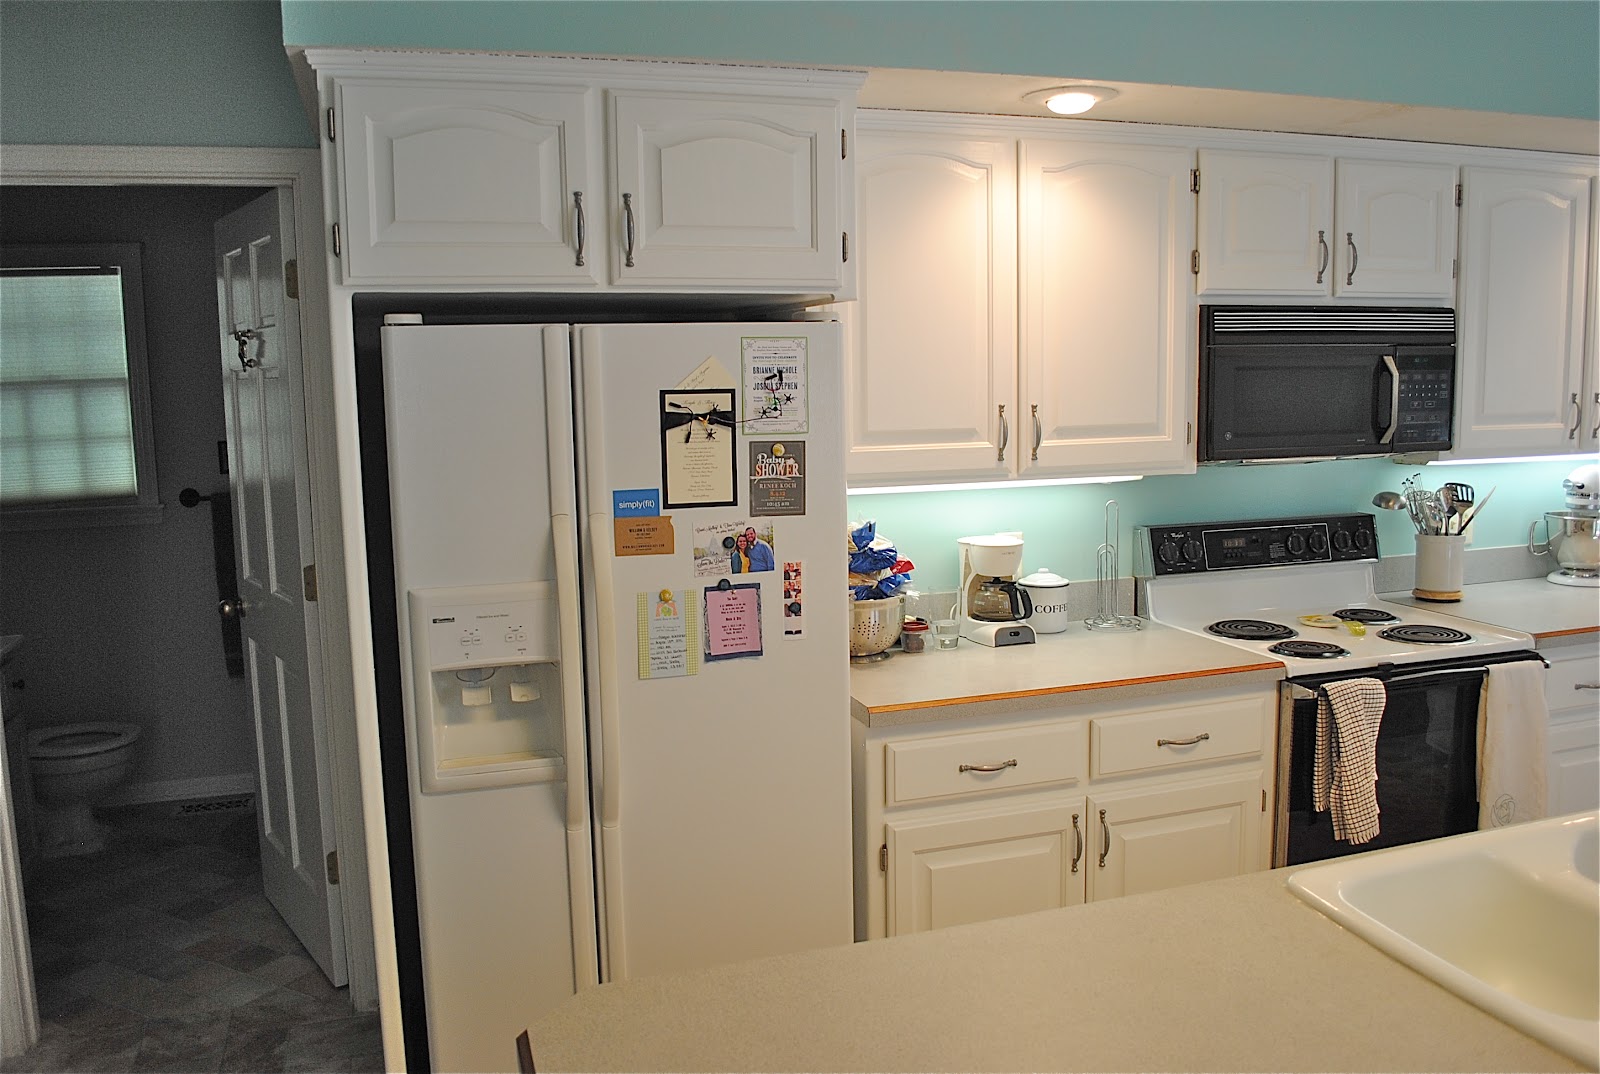
Seven months of planning later, here's the happiness that greets us every day.
 Crisp, clean, lovely, white.  (Ignore the almond outlet covers.  Someday...)
 So bright and chipper!
 And we LOVE how it looks next to the aqua walls.  Chills.
 Another view.  (Ignore the beast of a light fixture and the dark doors.  Another day...)
 Glass doors still need another coat of paint downstairs, so for now, we're rocking the open cabinets look.
 Aaaaaand we still need to re-install the little doors below the sink.  Those suckers are obnoxious.  Not that I spent any longer than 30 seconds looking at them before deciding that huzz needed to complete the removal task. 
 Now for a few deets.  We didn't purchase new hardware.  Even if we had scored a killer deal on hardware (like $2 or $2.50 a pop), we still would have spent nearly $150 or $200 on hardware.  Not awesome.  So we painted it.  Perhaps I'll explain someday our love of all things Rustoleum.  Seriously.  For $14 we had all new hardware.  Awesome.
 We did, on the other hand, purchase new hinges (mainly because we realized painting the hinges would result in extreme anger from yours truly due to the continual scrape of paint every time a door was opened).  We felt like we had two choices: (1) not order new hinges and eat out for every meal during the remainder of our tenure at our abode OR (2) purchase new hinges.  I think you know where this is going.

Initially, we thought hinges were going to run us $7 each.  Yikes!  No fun.  (Especially no fun considering we have 52 hinges.  Vomit.)  But Dansy, in his infinite knowledge of the interwebz, scored 54 hinges (accidentally ordered 2 extra) for $117 (including tax and shipping).  And a great shout was heard from Birchwood Lane.  !!!!!!!!!  And we're daaaaang pleased.  And I reorganized my baking cabinet.  Score.

 And, just so you have the full effect of the brightness of this room (and our new couch!), here is where we log a solid number of hours.  A great deal of naps have been had here.  And all are happy.

How about a few numbers? Dad, you're going to love this.
Hours spent on project:  over 100 (it is nauseating calculating any higher)

Painting helpers:  3 (Special shout-out to moms for logging countless hours priming - now that is a good story.  I promise I'll tell you soon.  And thanks to Cheri who drove from Wichita to spend a day off getting paint in her hair and hearing me complain about the mess I got myself into.  And many thanks to Dans for letting me go through with this astronomically larger than life project and for doing the things I didn't want to do.)

Miscellaneous helpers: 3 (Dad, thanks for loaning us painting equipment.  Brett, thanks for letting us borrow your sander for far too long.  And Tammy, thanks for offering to feed us over and over again.  You guys are all great.)

Cost:
Hardware paint:  $14
Hinges:  $117
Liquid sandpaper (aka: my new bestie):  $15
Primer:  $65 (latex) + $39 (oil-based)
Paint:  $100 (we used a little over 1 gallon)
Brushes, rollers, miscellaneous supplies: $50
Total:  $400
We could have saved close to $100 had I not thought that I knew more than the pros and decided to prime with latex paint.  Silly me.  The good news is that I have a few more painting projects up my sleeve, and now I had loads of extra primer.  It all works out in the end.

Hinges:  52

Pulls:  38

Door fronts:  26

Total coats of paint per surface:  4

Trips to Benjamin Moore over a 3 day period:  12 (I'm not even kidding.)

Strands of hair still covered in oil-based paint:  5

So even though it's not 100% finished, we're happy.  Really happy.  Would we do it again?  .........Yes.  But we would definitely listen to the pros.  Ha.  Check back later this week for the products we used and tales of the process.  

Now I'm going to go take a nap.