Showing posts with label Freezer Cooking. Show all posts

July 31, 2015

Freezer Meal Swapz

About a month ago Bennett and I went on a walk.  We go on a walk nearly every day (except for several of the hotter than hell days as of late).  The Benny LOVES being outside.  It's totally his jam.  When he was a wee screaming babe, being outside was one of the few things that calmed him down. So we would spend HOURS on our porch swing.  Hours.  And then my butt would fall asleep so I would have to choose between a numb bum and a screaming infant.  My rear still hasn't recovered.

I digress.

On this particular walk a few weeks ago, I was reminded that I would be heading back to work soon and that my freezer was currently empty.  I had a minor panic attack thinking, "How am I going to feed my boys when I come home from work exhausted every day?"  My mom and mother-in-law and step mother-in-law came to the rescue last year and filled my freezer to the brim, but this year I figure it should be my responsibility (still so thankful for the meals, mom, Carri, and Joy!).

After panicking for a bit, I pulled my head out of the sand and began brainstorming.  Walking is my think time and Lord knows I need it.  Benz is in his happy place waving at every squirrel that runs by and I'm in my happy place processing life.  It's the good stuff.

I won't give you too much of a glimpse into my brain because it would probably stress you out (ya'll, it's crazy in there), so I'll just cut to the chase (yeah right, like I ever do #amiright).

What I came up with was a freezer meal swap.  I threw the idea out there on the Faceboxes (mildly terrified that no one would think it was a good idea) and I was pleasantly surprised at the response.  So many women are busy and tired and trying to feed their families.  I am not alone.  YOU are not alone.  The response was so overwhelming (in a beautiful way) that I eventually had to cut it off at 20 (sorry to those who couldn't participate this round!).

It was one of those moments when I realized that this better work.  Or else literally dozens of people will be irritated and, worst of all, hungry and without go-to meals in their freezers.

The wheels started turning in my brain and what follows is how I organized it.  Readers, I'm posting this because I want you to do it.  I've fielded at least a dozen emails/messages from friends from all seasons of life and they all want to do this.  SO DO IT. :)  I can answer all your questions.  It's my favorite thing to do. If the size that we did it seems overwhelmingly large to you, then just do it with a few people.

Okay, ready for the nitty-gritty?  Let's go.

  • I made a Facebook event (it's the easiest thing.  My not young but not old mother can do it.  Love you, mom!).
  • I posted the guidelines (what you see here are the tweaked guidelines after I processed more). 
    • This is going to be so great, gals!  Please read the following guidelines and by RSVPing yes, you're committing to bringing meals that will be shared with others. :)  
    • Choose a recipe that you know is good.  Maybe a family favorite? Once you've decided, comment what you're planning to make...that way we won't end up with a dozen tator tot casseroles.  Believe me, almost everything can be turned into a freezer meal, so don't feel like you're stuck with meatballs and lasagna.  
    • Avoid really unique recipes - I'm sure Ethiopian food is delicious, but I'm not certain a freezer meal swap is the best place to introduce it. :)  If you're uncertain about your recipe, feel free to ask! 
    • As soon as I know how many gals are participating, I'll let you know how many batches to prepare. One batch needs to be enough to feed a family of 5 - so if you're only feeding 2 people, you'll technically walk away with double the meals!  
    • You must use brand-name freezer bags.  Obnoxious, I know.  But believe me, I've tried all the off-brands and they all leak.  So splurge a little for the sake of all the gals getting your food.  If your meal has a large amount of liquid, it would be good to double bag it.  
    • Freeze your meal prior to delivering it to Heidi's.  Please FREEZE IT FLAT - this is really important for storage reasons, of course.  
    • On the outside of your bag, label your meal as well as instructions for preparing.
    • You're only responsible for the main entree - no side dishes.  So if you put together crock-pot fajitas, you don't need to include cheese or tortillas or anything - just the meat/veggie/spice mixture. 
    • Bring a cooler or cooler bag to the swap to minimize thawing during transport. 
    • It would be extremely challenging to coordinate a dozen people's schedules, so here's what we'll do:   The exchange will begin Thursday, July 30 at 7:30 pm and if you're unable to come by at the actual swap, no worries!  But you must bring your meals prior to the exchange and then contact me to arrange another time for pick-up!
    • QUESTIONS?  Holler at me, gurls.
  • I invited the 20 women who expressed interest when I posed the initial question.  
  • Several women realized they wouldn't actually be able to participate, so the final number ended up being 15 which makes this type-A yahoo so happy because who doesn't love a number divisible by 5?!
  • Once the number was finalized, I posed a question to the group:  would you rather be split into two groups (one of 7 and one of 8) and end up with that many meals OR would you rather make 15 meals and end up with 15?  Several ladies opted for the smaller group, but after chatting with them individually they decided they could do 15 (thanks, gals, for being team players!).  I informed the gals that they needed to make 15 of their meal and bring 14 to the swap (keeping one for their family).  
  • Over the next few weeks women posted what they would bring and everyone got to work individually.  Some were so on the ball and made their meals immediately (love you, Rachel!) and others waited until the day before.  But it didn't matter when they made them which is one of the beauties of this method.
  • Women who wouldn't be able to attend the actual swap began dropping their food off a few days before the swap.
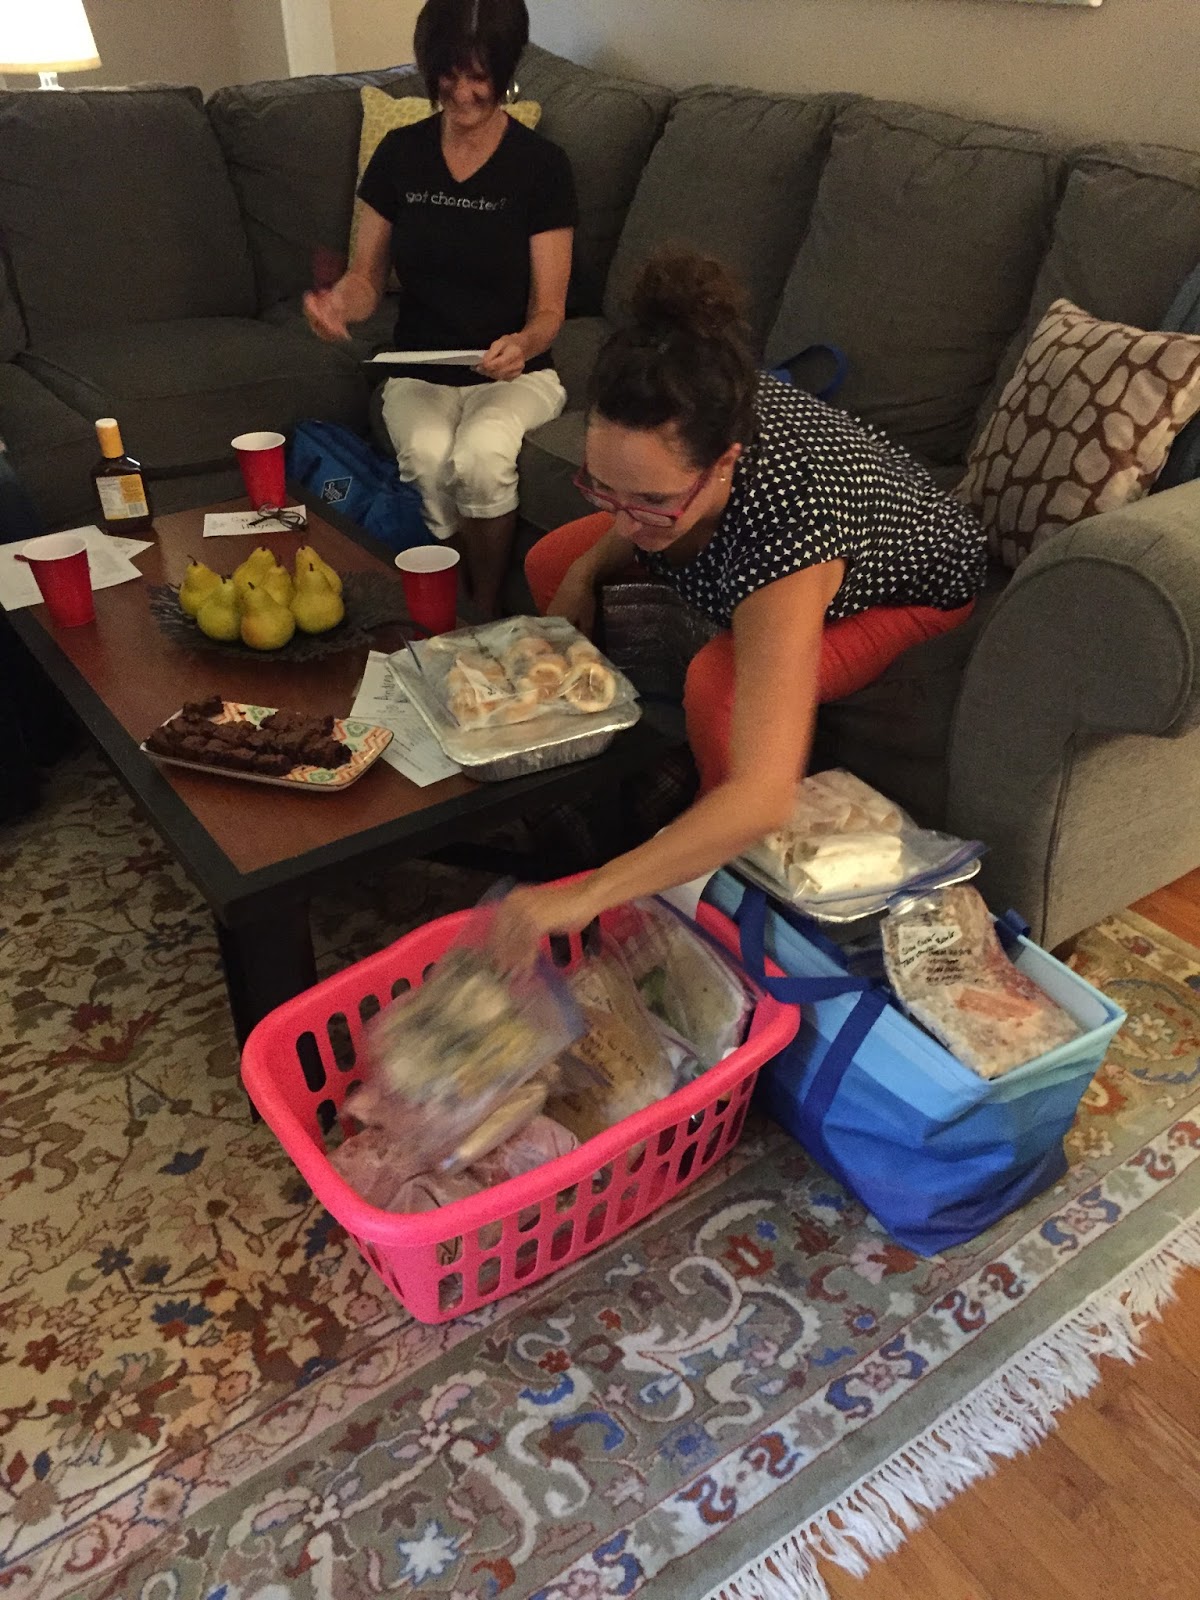
  • The night of the swap arrived and this is how I set up my space:


  • Only 9 women were able to be at the actual swap, so I assigned several a "buddy" who wouldn't be able to be there.  The women in attendance were responsible for collecting the 15 meals for their buddy but I would then store their meals until pick-up.  I assigned everyone a seat because #typeA.  Don't hate. I provided reusable grocery bags to "collect" the meals in but then the women transferred their meals into their own cooler once they had distributed their contribution. 
  • My SIL Tammy suggested that we do the swap "like a preschool Halloween candy exchange."  Preschool moms are the best.  I gave everyone a list of all the meals (see below).

Cook
Meal
Received
Maegan
Beef BBQ biscuits

Andrea
Loaded breakfast burritos

Marcy
Hawaiian BBQ chicken

Julie
Cilantro lime chicken

Tammy
Chicken taquitos

Melissa
Beef enchiladas

Ashley
Baked ziti

Stacy
Beef pasta veggie bake

Lyndsie
Chicken broccoli divan

Heidi
Stuff over fritos

Rachel
Chicken tortilla soup

Andrea
Chicken taco bowls

Tamela
Italian chicken

Grace
Taco soup

Angela
BBQ chicken enchiladas


  • Then I started with one of the meals that was dropped off.  I passed out one meal to each person.  Then another gal went to her ginormous cooler and passed out one meal to each person.  And it continued times 15.  We kept commenting how it was like Christmas.  But with food.  To feed our families.  From our freezer.  BEST. CHRISTMAS. PRESENT. EVER. #nooffensesanta
  • I provided gloves for anyone who had chilly hands (you laugh, but YOU try wrangling dozens of frozen meals without gloves...then we'll see who's laughing).  
  • These pics make it look like chaos, but, I'm telling ya, it was organized chaos!


  • There ya have it!

    There are many pros to doing freezer meals in this fashion, but here are just a few:
    • Making 15 of the same meal is so much easier than making 15 different meals (think buying in bulk, assembling individual meals assembly line style, etc.). 
    • Freezing flat really is the way to go - so much more storage space.
    • Who doesn't want an evening to spend with other ladies!?
    • It was a bit of a "worlds collide" night for me as women from work, church, and the community that I know all gathered.  I love times like that.
    • It took me 2 1/2 hours to make my 15 meals whereas when I've down freezer cooking in the past, I literally will spend ALL DAY and end up with 15 meals.  Having a kid has taught me many things including the fact that there is no such thing as efficiency anymore.  That being said, efficiency is the name of my game whenever I have the chance.

    By the numbers (because I'm like my dad and I like numbers):

    • 15 families walked away with 15 meals.
    • 225 meals were brought into my house
    • Each meal will feed at least a family of 5.  SO. That means 1,125 individual meals were distributed.  
    And just because I'm very introspective and very much a processor of all the things, here's my last food for thought.

    Late last year I had a vision of wanting to have 100 different people over for dinner throughout the year.  Well, life happens and I quickly realized it might not be possible.  Initially I was saddened by this thought but then I realized I could just pour more time and energy and resources into other things and not be so upset that I didn't even start to meet the goal I set.

    This morning on yet another walk (see above...walks are my "think time") I had a realization.  Though not as I had planned initially and certainly not entirely on my own, but WE fed 1,125 people indirectly from my home.  Life really is better when you do it with others.  Now get to cooking, ladies!  You will definitely not regret this!

    August 4, 2012

    Freezer Cooking 2: Feeding the Masses

    Greetings, fellow freezer-cooking friends!  Here are two incredibly easy recipes that will feed a crowd.  One is for breakfast and the other is perfect for when you're hosting a gazillion people OR for when you want to serve it tonight and have plenty for leftovers.  In regards to the breakfast recipe, don't be freaked out by the fact that you will be freezing eggs and milk.  It really is fine.  Just stick it in the freezer right after you make it and you'll be golden.  

    Sausage and Egg Casserole (serves 6-8)
    1 (6-8 oz) box croutons (the seasoned kinds are awesome - make for a great flava-flave)
    1 pound sausage - sauteed and drained (or bacon or ham or whatever meat you like)
    2 cups shredded cheddar cheese
    10 eggs
    2 cups milk
    Salt & pepper to taste
    1/2 t. dry mustard (I don't always do this and it is still super delish)

    Here's where you have some awesome options.  Either make 1 9x13 pan OR make 2 8x8 pans (you could freeze both or serve one today and freeze the other).  I prefer to make 2 smaller pans since our fam is teeny-tiny. 

    Spray pan(s) with non-stick spray.  Spread croutons over bottom of pan.  Cover with meat of choice, then cheese.  Beat eggs, milk, and seasonings together and pour over.  Cover and refrigerate for 8 hours or overnight.  Bake uncovered at 350 for 1 hour.  

    If freezing and baking later, allow at least 8 hours (no more than 24 hours) to thaw in the refrigerator.  Then bake uncovered at 350 for 1 hour (check at 45 minutes).

    Other modifications you could make:
    • Be vegetarian-friendly and substitute the meat with veggies.
    • Instead of using the suggested pan sizes above, make individual portions using ramekins.  Perfect if you're cooking only for yourself or if you want a handful of yummy, single-portioned breakfasts in the freezer. 

    This next recipe's a classic Sheree Glanzer meal, friends.  Entirely perfect for the Sunday when you invite a billion friends over for lunch or for a football game.  Like the breakfast casserole recipe above, it's also perfect for separating into smaller portions.  So mix once and dump into 2 or 3 freezer bags.  And who doesn't love cooking once and eating thrice!?

    Stuff Over Fritos (serves 12-15)
    2 lbs. ground beef - browned
    1 15 oz. can tomato sauce
    3 sm. cans tomato paste
    40 oz. water (5 cups - add this when you're ready to cook it, not pre-freezing...the water will totally weigh down your freezer bag)
    2 t. oregano
    2-3 t. chili powder
    2 t. salt
    2 t. cumin
    1 chopped onion
    Garlic salt to taste
    2 cans beans of your choice (I use one can of black beans and one can of red beans)

    After browning meat, combing all ingredients.  If serving immediately, allow to simmer at least one hour on the stove OR cook in crock-pot 8-10 hours on low.  

    If freezing and serving later, mix all ingredients (except the water), place in desired amount of freezer bags, and freeze flat.  Allow 1-2 days to thaw in your refrigerator before placing meal in crock-pot

    Serve over corn chips, lettuce, chopped tomatoes, grated cheese, sour cream, black olives, and salsa.    
    Make these items today and feed your people for the next week.  They'll love it.  I've gotz lotz more recipes to share.  Let me know if you want them for your freezer repertoire!

    August 2, 2012

    Freezer Cooking: Breakfast Burritos

    Breakfast burritos are great for everything.  Seriously.  Breakfast, brunch, lunch, snack, dinner, friends, family, neighbors, pets, etc. etc.  You should make this recipe right now, feed your family in a flash, and freeze the leftovers.  Your breakfasts for the next 2 weeks will be off the charts.

    Freezer-friendly Breakfast Burritos
    18 eggs
    1/2 cup milk
    1/4 cup butter
    1/4 cup green pepper
    1/4 cup onion
    2 cups cheddar cheese
    1 lb. sausage (or bacon or ham or whatever you prefer)
    20ish tortillas


    Brown sausage and set aside in a ginormous bowl.  Saute onions and peppers.  Whisk milk, butter, and eggs and then scramble eggs over medium heat.  When eggs are cooked, add to browned sausage.  Add cheese, onions, and peppers.  Wrap 1/3 to 1/2 cup of mixture in a tortilla (make sure you wrap it like a present, not a taco...that way the filling will stay in the tortilla).  Wrap tortilla in small paper towel and put in freezer bags.  When ready to reheat, microwave burrito (still wrapped with a paper towel!) for 2 minutes, flipping at 1 minute.  

    People, I can't explain to you how easy and awesome these are.  But please please please use a non-stick pan to scramble your eggs.  Or be like me and use a regular skillet and then scrape it for 15 minutes a day for the next week.  Not even kidding.  

    Enjoy!

    PS: Do you need any other freezer-friendly recipes?  Always happy to share! :)

    April 12, 2012

    Domestic Day: Round 2

    Remember our first "Domestic Day"?  And then remember when I finally shared the recipes?  And remember when I told you that I would tell you about our second domestic day?  Please say you followed all those links....

    Weeeeeeeellllllllllll.  We had another domestic day.  And it was epic. Epicly awesome.  (Purpose of domestic day = bake lots, talk lots, be together lots, eat lots, etc. lots)

    It was my turn to travel, so I converged (with all my baking gadgets) upon Cheri's sweet kitchen.

    The pan we were using may or may not have been too big for the oven, so Cheri may or may not have been keeping the oven door sealed with her backside.  Like I said...may or may not.
     Baking is just happy work.  Everything is yellow, but yellow is a happy color. 
     Yellow is the color of only good things: butter, cookies, bread, sunshine, flowers, and......other stuff.
     We tried a few new recipes, but mainly stuck with the tried and true ones from last time. (If you didn't follow the link to the recipes, do that NOW.  You won't regret it.)
     Cheri knocked out 8 loaves of bread while I hammered out dozens of cookies and breakfast bars.
     Um, yum.
     Okay, so we tried a new method with our pizza crusts.  And it worked like a charm.  Seriously.  We allowed the dough to go through it's whole slow and steady rising time.  Then we baked it for 5 minutes, let it cool, wrapped it, and froze it.  I used mine a few weeks ago, and I was wowed at the deliciousness of the frozen crust.  (PS - I believe I have the best recipe for pizza crust EVER.  See below.)
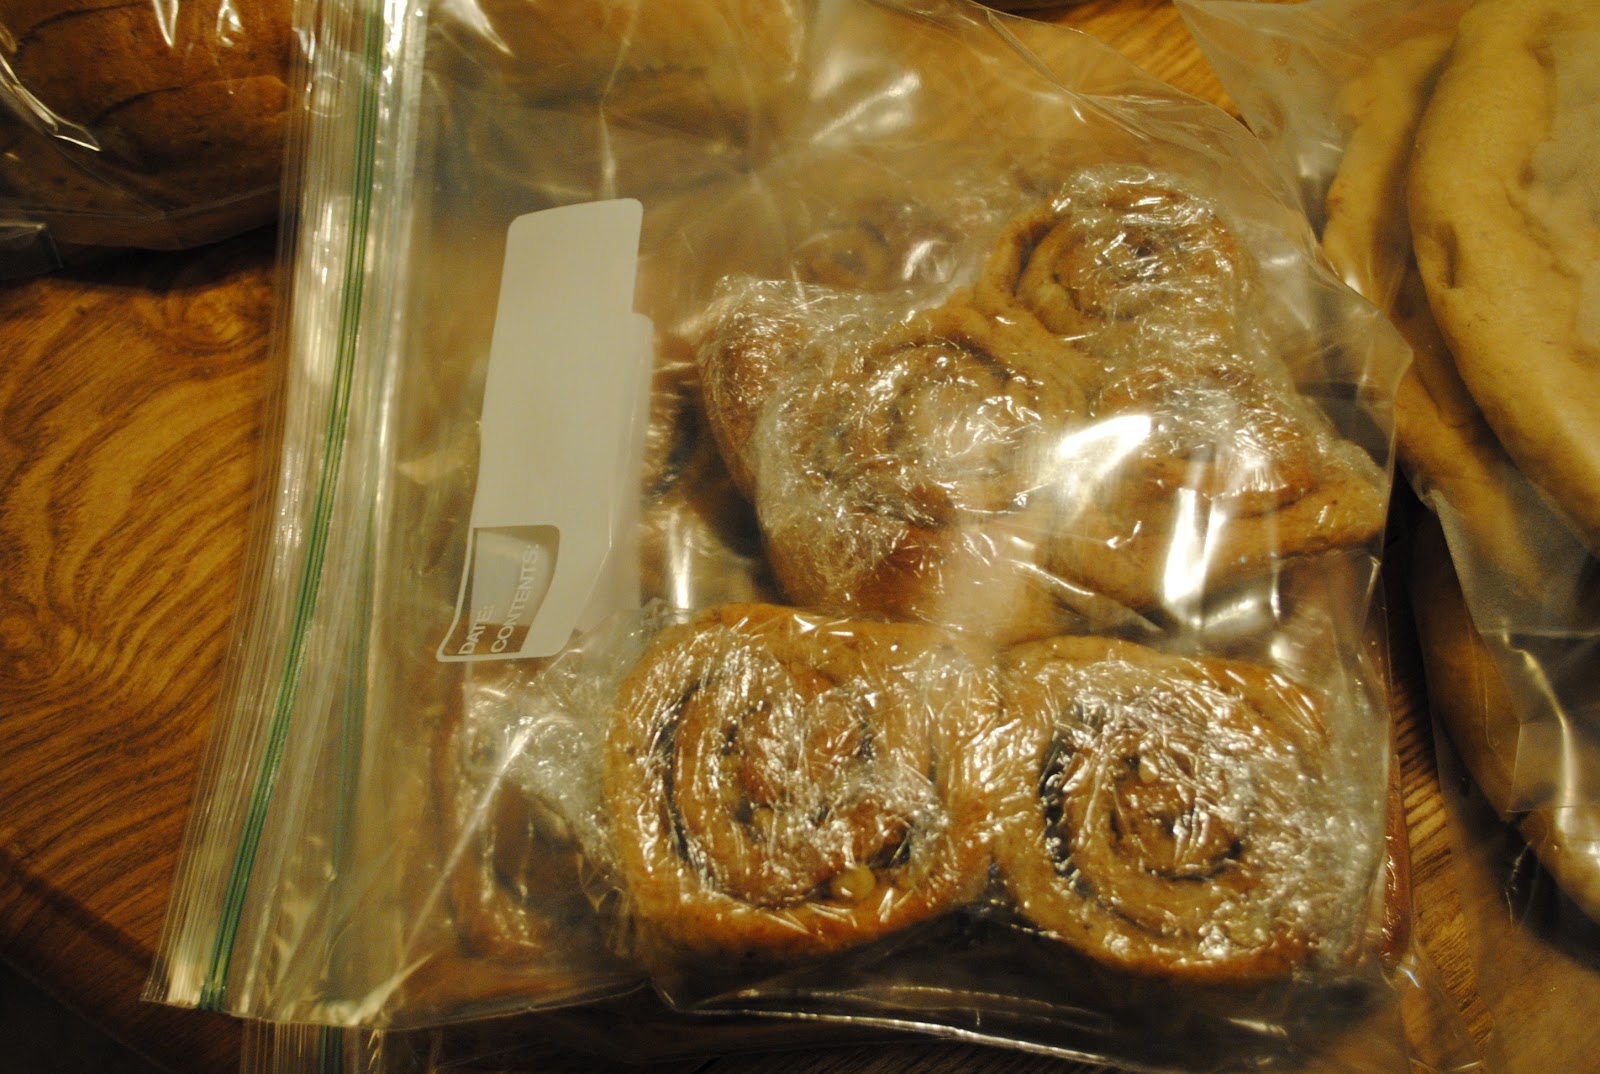
     Cinnamon roll time.  We used Pioneer Woman's recipe, but added white and brown sugar to the innards as well as walnuts.  We also used white whole wheat for the dough and added flax seed to give it, as Cheri says, "girth" in the morning.

     Mmmmmm.  Butter.

     Mmmmmmm. Sugar.  And nuts.

     If this doesn't make you immediately salivate, I don't know what will.  (Maybe a less-yellow picture?  Sorry, I only take yellow-infiltrated pics whilst baking.)

     Our loot!
     And our genius packing system:  wrap 2 cinnamon rolls in plastic and place in freezer bag.  On the weekends, I've been pulling out a pair and defrosting instead of having to defrost an entire 9 x 13.  Genius, I tell you. Well, Cher's the genius in our friendship. I'm fairly confident she has more baking brain cells than I
     Done, and done.

    I would love to say that our day(s) ended happily.  But I can't.  While helping me carry my billion bags of stuff to my car, Cheri slipped on a leaf (on the stairs!!) and hit the back of her head something fierce.  I encouraged her to sue her apartment for negligence.  But Cheri ain't like that.  She's a real gem.  (Update:  she has since recovered, but she reported that the rest of that near-fatal day was a bit foggy.)

    And, as promised, here is the faithful pizza crust recipe:

    Pan Pizza (makes 2 9 inch pizzas)
    1/2 c. olive oil
    3/4 c. plus 2 T. milk, warmed to 110
    2 t. sugar (or honey)
    2 1/3 c. all-purpose flour (sometimes I use whole wheat to jazz it up...you'll just need more liquid if you do that)
    1 package instant yeast
    1/2 t. salt

    Heat oven to 200.  When the oven reaches 200, turn it off. Lightly grease large bowl with cooking spray.  Coat each of the 2 9-inch cake pans with 3 T. oil.  Mix milk, sugar, and remaining 2 T. oil in measuring cup.  Mix flour, yeast, and salt in standing mixer fitted with dough hook.  Turn maching to low and slowly add milk mixture.  After dough comes together, increase speed to medium-low and mix until dough is shiny and smooth (give it time with this step).  Turn dough onto lightly floured counter, gently shape into ball, and place in greased bowl.  Cover with plastic wrap and place in warm oven until doubled in size (30 minutes...or 20, if you're impatient like me).

    Transfer dough to lightly floured counter, divide in half, and lightly roll each half into a ball.  Working with 1 dough ball at a time, roll, shape, and press dough in pan.  Cover with plastic and set in warm spot (not oven) until puffy and slightly risen (20 minutes).  Top with awesome things and bake at 400 for about 20 minutes.

    Make pizza now.  This one will knock your socks off.  Yum.  Happy domesticity!

    November 15, 2011

    Be Realz

    im gunna b rlz 4 a sec. tk it r lv it.

    I'm a little tired of sloppy work.  And by a "little," I mean A LOT.  I've gone through too much red ink...

    I know my kiddos have a life outside of my class.  In fact, I regularly remind myself that my classroom is far from real life.

    But seriously.

    Marking up essay after essay and study guide after study guide is just exhausting.  I've been timing myself as I've been grading the latest batch of essays.  The strugglers take up to 10 minutes to grade while the beauties take 3-4 minutes.  I sigh.

    And then there are the bright moments:
    • The kiddo who stays until 5 to catch up in my class
    • The connections made to the Kardashians...regardless of what we're reading
    • The team who names themselves "Mrs. Carlson's Favorite"...and then wins the review game.  I laugh.
    • The student who comes in at 7 am for help
    • The last-minute unit switcheroo that actually works
    • The sound of students thinking = silence 
     Teaching is wonderful.  Really wonderful.  But so so so exhausting.  To all you teachers out there - I feel your pain, and I rejoice in your light-bulb moments.

    I've never been one to "live for the weekend," but I am thankful for Thanksgiving break.

    I am also, however, thankful that my kids like what we're doing.

    Life is too short to dwell with negative Nancy's.  As I tell my students:  it's all about perspective.

    Current perspective I'm aiming for:  glass half-full.

    September 9, 2011

    Domestic Day Update: Recipes!

    Per the millions of requests I received for the recipes from Domestic Day, here they are...and they are all super delish.  In fact, I'm eating a sampling of the first recipe right now.  Yumo.

    Healthified Oatmeal Peanut Butter Breakfast Cookies
    1/2cup mashed banana (about 1 large)
    1/2cup chunky natural peanut butter (unsalted and unsweetened)
    1/2cup honey
    1teaspoon vanilla
    1cup rolled oats
    1/2cup Gold Medal® whole wheat flour
    1/4cup nonfat dry milk powder
    2teaspoons ground cinnamon
    1/4teaspoon baking soda
    1cup dried cranberries or raisins

    Preheat oven to 350°F. Lightly coat two cookie sheets with cooking spray; set aside. In a large bowl, stir together banana, peanut butter, honey, and vanilla. In a small bowl, combine oats, flour, milk powder, cinnamon, and baking soda. Stir the oat mixture into the banana mixture until combined. Stir in dried cranberries.
    Using a ¼-cup measure, drop mounds of dough 3 inches apart on prepared cookie sheets. With a thin metal or small plastic spatula dipped in water, flatten and spread each mound of dough to a 2¾-inch round, about ½ inch thick.

    Bake, one sheet at a time, for 14 to 16 minutes or until browned. Transfer to wire racks to cool completely. Store in an airtight container or resealable plastic bag for up to 3 days or freeze for up to 2 months; thaw before serving.

    Verdict:  the best after school snack.  Just enough sweet to satisfy and enough protein to rid me of my afternoon headache.  Perf.


    Whole Wheat Pizza Crust
    Ingredients:
    1 teaspoon white sugar
    1 1/2 cups warm water (110 degrees F
    /45 degrees C)
    1 tablespoon active dry yeast
    1 tablespoon olive oil
    1 teaspoon salt
    2 cups whole wheat flour
    1 1/2 cups all-purpose flour
    Directions:
    1. In a large bowl, dissolve sugar in warm water. Sprinkle yeast over the top, and let stand for about 10 minutes, until foamy.
    2. Stir the olive oil and salt into the yeast mixture, then mix in the whole wheat flour and 1 cup of the all-purpose flour until dough starts to come together. Tip dough out onto a surface floured with the remaining all-purpose flour, and knead until all of the flour has been absorbed, and the ball of dough becomes smooth, about 10 minutes. Place dough in an oiled bowl, and turn to coat the surface. Cover loosely with a towel, and let stand in a warm place until doubled in size, about 1 hour.
    3. When the dough is doubled, tip the dough out onto a lightly floured surface, and divide into 2 pieces for 2 thin crust, or leave whole to make one thick crust. Form into a tight ball. Let rise for about 45 minutes, until doubled.
    4. Preheat the oven to 425 degrees F (220 degrees C). Roll a ball of dough with a rolling pin until it will not stretch any further. Then, drape it over both of your fists, and gently pull the edges outward, while rotating the crust. When the circle has reached the desired size, place on a well oiled pizza pan. Top pizza with your favorite toppings, such as sauce, cheese, meats, or vegetables.
    5. Bake for 16 to 20 minutes (depending on thickness) in the preheated oven, until the crust is crisp and golden at the edges, and cheese is melted on the top.

    Verdict:  we froze these, and we have not tried them yet.  I imagine they're better fresh than frozen, but I never say no to a solid freezer meal option. 

    Whole Wheat Challah (Cheri prefaced this in her e-mail with "hahahahahahahaha" because it was such a disaster.  We haven't dove into our stash of it yet...)

    4 cups whole wheat flour
    1 t. salt
    2 1/4 t. active dry yeast
    2 T. vital wheat gluten
    1/2 c. honey
    1/2 c. olive oil
    1 c. warm water
    2 eggs
    1/4 c. raisins, to taste (optional - we optioned not)

    1. In a large bowl, stir together the flour, salt, yeast, and vital wheat gluten until well mixed. In another bowl, stir together the honey, olive oil, water, eggs, and raisins. Pour the liquid mixture into the flour mixture, and stir until it forms a dough.
    2. Turn the dough out onto a floured surface, and knead until smooth and elastic, about 10 minutes. Form the dough into a round shape. Lightly oil a bowl, place the dough in the bowl, and turn the dough over a few times to oil the surface. Cover the bowl with a cloth, and let rise in a warm, draft-free place until doubled, about 1 hour.
    3. Punch down the dough, knead it a few times to remove some of the bubbles, and cut it into 2 equal-sized pieces. Set 1 piece of dough aside under a cloth to prevent drying out while you shape or braid the first loaf as desired.
    4. Working on a floured surface, roll the small dough pieces into ropes about the thickness of your thumb and about 12 inches long. Ropes should be fatter in the middle and thinner at the ends. Pinch 3 ropes together at the top and braid them. Starting with the strand to the right, move it to the left over the middle strand (that strand becomes the new middle strand.) Take the strand farthest to the left, and move it over the new middle strand. Continue braiding, alternating sides each time, until the loaf is braided, and pinch the ends together and fold them underneath for a neat look. Repeat for the other loaf, place the braided loaves on a baking sheet lined with parchment paper, and let rise in a warm place until doubled, about 30 minutes.
    5. Preheat oven to 350 degrees F (175 degrees C).
    6. Bake in the preheated oven until golden brown, about 30 minutes. Serve warm for best flavor.

      Verdict:  I dunno.
      Whole Wheat Bread - Mama Joye's adaptation: 

      2 Cups warm water
      1/2 cup brown sugar OR 1/4 cup honey
      1/4 cup oil
      1 egg
      1 Tbsp Lecithin granules
      2 1/2 tsp salt
      1 1/2 Tbsp instant yeast
      2 TBSP dough enhancer
      2 TBSP gluton
      4-5 cups whole wheat flour (white whole wheat is preferred - but we mixed regular and white whole wheat)

      Mix together first 9 ingredients along with 1 cup flour. Beat ingredients together well for 2-3 minutes. Add additional flour until dough comes cleanly away from the bowl. Place dough into a greased bowl and cover. Allow to rise until doubled. Divide dough in half and roll out into a rectangle and roll up. Place seam side down in bread pan. Cover with a clean cloth and let rise until "light." Bake at 350 for 24 minutes. Remove from pan, brush top with butter and let cool before storing.

      Makes 2 loaves.
      Verdict:  Um, so good that we may have eaten an entire loaf in a few days.  Embarrassing?  No.  Bloated?  Perhaps.  TMI?  Never.
      Oatmeal Bread - Also by Joye

      Combine in large bowl: 
      1 cup oatmeal
      1/2 cup wheat flour
      1/2 cup brown sugar
      2 tsp salt
      2 TBSP shortening

      Pour 2 cups boiling water over the aforementioned ingredients. Let set until cooled to luke warm. Pour into mixer bowl and add: 

      1 TBSP instant yeast
      1 TBSP dough enhancer
      1 TBSP gluton

      Beat in 4-5 cups of flour until dough leaves sides of the bowl clean. Place dough into a greased bowl and cover. Allow to rise until doubled. Divide dough in half and roll out into a rectangle and roll up. Place seam side down in bread pan. Cover with a clean cloth and let rise until "light." Bake at 350 for 24 minutes. Optional: brush dough with shortening and sprinkle with oatmeal before baking.

      Makes 2 loaves.
      Verdict:  Um, also super yum.  And since there's oatmeal inside, you can feel good about eating an entire loaf at once.  Not speaking from experience...

      We also made oatmeal/peanut butter/chocolate chip cookies, but I figured you already had a recipe for that.  If you didn't or if you're in need of a newer, more pizzazzier recipe, holler.

      Enjoy!  And let me know how much you love it all!

      PS:  Because every blog post is better with a picture school tale, I leave you with this one...

      My freshies were being just that (freshman like, that is) on Wednesday, and I couldn't take it anymore.  Sooooooo, I stopped what I was doing and said, "Listen here.  You know how in first grade, whenever the teacher says something, every student must make a comment?  Like, 'Children, today we're going to do math with apples.' 'Oh, oh!  My mom makes applesauce sometimes!' 'Oh, oh!  Apples sometimes make me toot.' Etc.  Well, that's how I feel right now.  It is not necessary for you to comment on everything I say.  So, please. keep your comments to yourself unless they apply.  Okay, let's get back to work."  And the strangest thing is, it was mildly effective!  Note to self:  while comparing teenagers to children may occasionally be inappropriate and quasi-humiliating, it actually works.  Do not do every day, but once every two weeks is okay.  

      Have a happy weekend, gang.  More tales to come...


    August 27, 2011

    Domestic Day

    Bestie Cheri and I spent last Saturday baking.  We began promptly when she arrived at 10 am.

    List made.

    Groceries purchased.

    Lunch had.

    Then the baking began.  All 8 hours of it.

    This was our supply station. 
     Bakers before.  Caution:  no after was taken.  Too tired.
     Chers brought her Bosch.  I'm in love with my KitchenAid, but this mixer puts mine to shame.  It's serious business.
     In the process of making 4 dozen breakfast cookies.  Super yum.  Note the first batch of dough rising in the background.  Also note my freakishly small kitchen.
     Pre-bierock making and buttered bread pans. 
     Mid-bread making. 
     Mid-bread making.  Yes, mid.
     Mid-cookie baking.  Only 4 sticks of butter were used in the making of the cookies.  Only.  Note Daniel in the background holding down the fort.  He enjoyed tasting the fruit of our labors and was handed all the rejects.  Not a bad deal for him.
     Whole wheat pizza dough awaiting it's resting place in the freezer.
     Mid-bierock making.  These are the best bierocks I have ever had.  Recipe anyone?  Holler. 
     The fruits of our labor.  
     10 loaves of bread.  4 dozen breakfast cookies.  4 dozenish oatmeal, peanut butter, and chocolate chip cookies.
     20 bierocks.  10 dinner rolls made from the excess bierock dough. 
     12 pizza doughs.  4 loaves of challah bread.  It's okay if you don't know what that is. I didn't either.  Apparently it's especially excellent as French toast. 
    And we're set for a few months. Only one "mistake" all day, and we don't even know what we did wrong...but the challah was a little strange.  Perhaps it was because I thought my KitchenAid could handle 8 cups of flour.  Note to self:  it cannot.  Or perhaps it was because the challah was the last thing we made and we were absolutely spent.

    Plans are already underway for our winter "Domestic Day."  And cinnamon rolls are the first sweet on the list.  Just so you know.

    I love my Cheri and I love me some baking, so it was the most perfect day.  And I only gained a few pounds throughout the day while tasting everything we made.  Not too bad.

    Curious about any recipes?  Holler!

    And thanks, Cheri, for making the trip, for bringing your Bosch baby, and for supplying all the things that made everything (even the cookies!) healthy.  You da, you da best.