Friends. I only have a few school-related funnies, but let's go ahead and get started.
1:
Let me set up the scenario. Two days ago, I wore skinny black pants to school. It's important to know that I wear these at least once week and I've had them since last fall. They're dang comfortable and they're black, so they go with everything. I've never, in my dozens and dozens of times of wearing them, had a student make a comment in regards to their style/fit. I suppose there's a first thing for everything. What follows is the dialogue between a female student and I:
Female Student: Mrs. Carlson, are those skinny jeans?
MC: Yes.
FS: I bet you feel like you're in high school again when you wear those.
MC: Well, skinny jeans weren't around when I was in high school.
FS: It's only a matter of time before you're walking in the hall and a boy comes up behind you and is all, "Hey girl, how you doin?"
MC: Thankfully that hasn't happened yet.
End of conversation.
2:
I walked into school this morning at approximately 6:50 am (I'm a morning person, just let me be). And what should my wandering eyes see?
A hostile mob of parents? No.
The marching band? No.
A stray cat? No.
A million construction workers? Yes, but that's not the point.
A suspicious bookbag? No.
A snake? Yes.
YES!!!!!!!!!!!!
People, I do not lie to you. One of satan's own was on the freshly scrubbed tile. Thankfully a student was only a few feet ahead of me. I literally froze in my tracks when I saw it. Enter dialogue:
MC: Is that a snake?
Male Student: Yes.
MC: Are you afraid of snakes?
MS: No.
MC: Will you please remove it from the premises?
MS: Yes.
I stuck around long enough to see said male student pick up said spawn of satan. Then I bolted to my classroom, keeping watch over every crevice where another spawn might live. Nasty.
That's all I have for now. Come back later...there's sure to be more.

August 24, 2012
August 6, 2012
Summer 2012
A farewell to summer 2012 and space phone pictures:
You were fun, my sweet summer.
You were full and wild.
You put paint in my hair.
And made me feel like a child.
 Much food was consumed
While a symphony was heard
It only would've been better
To have the view of a bird
 We camped in the desert
And got a terrible sun burn
While it made a good memory
I said, "No more!" very stern
 With bats in the attic
Huzzie knew just what to do
So he donned a ridiculous suit
And the space is good as new
 Lots of time with friends
And lots of belly laughs
Memories made all around
And only a few social gaffs
 Challenges to the heart
Not to be taken lightly
God's doing a new thing
We only need to move slightly
 Hours of prepping, priming, and painting
And gallons of paint washed off my hands
Summer, you knew this was a heckuva project
It's done! I now watch the Olympics from my couch (aka: grand stands)
 Vacation, vacation,
You have such a sweet tone
Especially with a fam
Who is super to the bone


 Daniel even wore red pants
But only for a short bit
Would have totally bought them
If they were a better fit
 And last but not least
We celebrated these two
Adorable twinsies
Before them, what did we do!?

 Summer, you were kind
But you went so dang fast
Please come again
And let it not be your last.
Love,
Heidi
You were fun, my sweet summer.
You were full and wild.
You put paint in my hair.
And made me feel like a child.

While a symphony was heard
It only would've been better
To have the view of a bird

And got a terrible sun burn
While it made a good memory
I said, "No more!" very stern

Huzzie knew just what to do
So he donned a ridiculous suit
And the space is good as new
 Lots of time with friends
And lots of belly laughs
Memories made all around
And only a few social gaffs

Not to be taken lightly
God's doing a new thing
We only need to move slightly

And gallons of paint washed off my hands
Summer, you knew this was a heckuva project
It's done! I now watch the Olympics from my couch (aka: grand stands)

You have such a sweet tone
Especially with a fam
Who is super to the bone


But only for a short bit
Would have totally bought them
If they were a better fit

We celebrated these two
Adorable twinsies
Before them, what did we do!?


But you went so dang fast
Please come again
And let it not be your last.
Love,
Heidi
August 4, 2012
Freezer Cooking 2: Feeding the Masses
Greetings, fellow freezer-cooking friends! Here are two incredibly easy recipes that will feed a crowd. One is for breakfast and the other is perfect for when you're hosting a gazillion people OR for when you want to serve it tonight and have plenty for leftovers. In regards to the breakfast recipe, don't be freaked out by the fact that you will be freezing eggs and milk. It really is fine. Just stick it in the freezer right after you make it and you'll be golden.
Sausage and Egg Casserole (serves 6-8)
1 (6-8 oz) box croutons (the seasoned kinds are awesome - make for a great flava-flave)
1 pound sausage - sauteed and drained (or bacon or ham or whatever meat you like)
2 cups shredded cheddar cheese
10 eggs
2 cups milk
Salt & pepper to taste
1/2 t. dry mustard (I don't always do this and it is still super delish)
Here's where you have some awesome options. Either make 1 9x13 pan OR make 2 8x8 pans (you could freeze both or serve one today and freeze the other). I prefer to make 2 smaller pans since our fam is teeny-tiny.
Spray pan(s) with non-stick spray. Spread croutons over bottom of pan. Cover with meat of choice, then cheese. Beat eggs, milk, and seasonings together and pour over. Cover and refrigerate for 8 hours or overnight. Bake uncovered at 350 for 1 hour.
If freezing and baking later, allow at least 8 hours (no more than 24 hours) to thaw in the refrigerator. Then bake uncovered at 350 for 1 hour (check at 45 minutes).
Other modifications you could make:
This next recipe's a classic Sheree Glanzer meal, friends. Entirely perfect for the Sunday when you invite a billion friends over for lunch or for a football game. Like the breakfast casserole recipe above, it's also perfect for separating into smaller portions. So mix once and dump into 2 or 3 freezer bags. And who doesn't love cooking once and eating thrice!?
Stuff Over Fritos (serves 12-15)
2 lbs. ground beef - browned
1 15 oz. can tomato sauce
3 sm. cans tomato paste
40 oz. water (5 cups - add this when you're ready to cook it, not pre-freezing...the water will totally weigh down your freezer bag)
2 t. oregano
2-3 t. chili powder
2 t. salt
2 t. cumin
1 chopped onion
Garlic salt to taste
2 cans beans of your choice (I use one can of black beans and one can of red beans)
After browning meat, combing all ingredients. If serving immediately, allow to simmer at least one hour on the stove OR cook in crock-pot 8-10 hours on low.
If freezing and serving later, mix all ingredients (except the water), place in desired amount of freezer bags, and freeze flat. Allow 1-2 days to thaw in your refrigerator before placing meal in crock-pot.
Serve over corn chips, lettuce, chopped tomatoes, grated cheese, sour cream, black olives, and salsa.
Make these items today and feed your people for the next week. They'll love it. I've gotz lotz more recipes to share. Let me know if you want them for your freezer repertoire!
Sausage and Egg Casserole (serves 6-8)
1 (6-8 oz) box croutons (the seasoned kinds are awesome - make for a great flava-flave)
1 pound sausage - sauteed and drained (or bacon or ham or whatever meat you like)
2 cups shredded cheddar cheese
10 eggs
2 cups milk
Salt & pepper to taste
1/2 t. dry mustard (I don't always do this and it is still super delish)
Here's where you have some awesome options. Either make 1 9x13 pan OR make 2 8x8 pans (you could freeze both or serve one today and freeze the other). I prefer to make 2 smaller pans since our fam is teeny-tiny.
Spray pan(s) with non-stick spray. Spread croutons over bottom of pan. Cover with meat of choice, then cheese. Beat eggs, milk, and seasonings together and pour over. Cover and refrigerate for 8 hours or overnight. Bake uncovered at 350 for 1 hour.
If freezing and baking later, allow at least 8 hours (no more than 24 hours) to thaw in the refrigerator. Then bake uncovered at 350 for 1 hour (check at 45 minutes).
Other modifications you could make:
- Be vegetarian-friendly and substitute the meat with veggies.
- Instead of using the suggested pan sizes above, make individual portions using ramekins. Perfect if you're cooking only for yourself or if you want a handful of yummy, single-portioned breakfasts in the freezer.
This next recipe's a classic Sheree Glanzer meal, friends. Entirely perfect for the Sunday when you invite a billion friends over for lunch or for a football game. Like the breakfast casserole recipe above, it's also perfect for separating into smaller portions. So mix once and dump into 2 or 3 freezer bags. And who doesn't love cooking once and eating thrice!?
Stuff Over Fritos (serves 12-15)
2 lbs. ground beef - browned
1 15 oz. can tomato sauce
3 sm. cans tomato paste
40 oz. water (5 cups - add this when you're ready to cook it, not pre-freezing...the water will totally weigh down your freezer bag)
2 t. oregano
2-3 t. chili powder
2 t. salt
2 t. cumin
1 chopped onion
Garlic salt to taste
2 cans beans of your choice (I use one can of black beans and one can of red beans)
After browning meat, combing all ingredients. If serving immediately, allow to simmer at least one hour on the stove OR cook in crock-pot 8-10 hours on low.
If freezing and serving later, mix all ingredients (except the water), place in desired amount of freezer bags, and freeze flat. Allow 1-2 days to thaw in your refrigerator before placing meal in crock-pot.
Serve over corn chips, lettuce, chopped tomatoes, grated cheese, sour cream, black olives, and salsa.
Make these items today and feed your people for the next week. They'll love it. I've gotz lotz more recipes to share. Let me know if you want them for your freezer repertoire!
August 2, 2012
Freezer Cooking: Breakfast Burritos
Breakfast burritos are great for everything. Seriously. Breakfast, brunch, lunch, snack, dinner, friends, family, neighbors, pets, etc. etc. You should make this recipe right now, feed your family in a flash, and freeze the leftovers. Your breakfasts for the next 2 weeks will be off the charts.
Freezer-friendly Breakfast Burritos
18 eggs
1/2 cup milk
1/4 cup butter
1/4 cup green pepper
1/4 cup onion
2 cups cheddar cheese
1 lb. sausage (or bacon or ham or whatever you prefer)
20ish tortillas
Brown sausage and set aside in a ginormous bowl. Saute onions and peppers. Whisk milk, butter, and eggs and then scramble eggs over medium heat. When eggs are cooked, add to browned sausage. Add cheese, onions, and peppers. Wrap 1/3 to 1/2 cup of mixture in a tortilla (make sure you wrap it like a present, not a taco...that way the filling will stay in the tortilla). Wrap tortilla in small paper towel and put in freezer bags. When ready to reheat, microwave burrito (still wrapped with a paper towel!) for 2 minutes, flipping at 1 minute.
People, I can't explain to you how easy and awesome these are. But please please please use a non-stick pan to scramble your eggs. Or be like me and use a regular skillet and then scrape it for 15 minutes a day for the next week. Not even kidding.
Enjoy!
PS: Do you need any other freezer-friendly recipes? Always happy to share! :)
July 26, 2012
Paint! And Stuff.
We appreciate a dollar saved. A lot. I mentioned a few days ago that we saved hundreds of dollars by painting the pulls. So even though we ordered new hinges (remember, so yours truly wouldn't cringe each time a door was opened due to the scraping of paint), we scored a killer deal and saved boat-loads.
So if you're looking to make a quick update to your kitchen, bathroom, or dresser, don't purchase new hardware - paint it! Our new best friend is Rustoleum spray paint. We used Hammered Silver for the kitchen pulls.
 Several coats later and we had a nice "hammered" look.
 For about a gazillion other little projects, we've been using Rustoleum Metallic. The silver below is not what we used, but I apparently misplaced the correct color. While the Metallic Silver is nice (we initially planned on using it on the kitchen pulls), we decided that the sparkles would look cheap. So even though our method was cheap, we didn't want it to look it.
 Metallic Oil-Rubbed Bronze.


 Pre-painting.
 Sweet little yellow chair.

 With only a few days of summer left, who knows what other mini-projects I'll be tackling. Any suggestions?
Happy rainy day!
So if you're looking to make a quick update to your kitchen, bathroom, or dresser, don't purchase new hardware - paint it! Our new best friend is Rustoleum spray paint. We used Hammered Silver for the kitchen pulls.


On a whim, Daniel taped off the bathroom faucet and gave it a few quick coats. I'm fairly certain we saved at least $100 with this mini-project.

Finally, to update one of our sweet little white chairs, I gave it a quick coat of sunny yellow.


So cheery.

Happy rainy day!
July 25, 2012
Painting Kitchen Cabinets: Part 2
Here are the nitty-gritty details of how we painted our kitchen cabinets.
 First, the process that DIDN'T work. I had spent 7 months researching the process, and I really felt like what I nailed down was going to be great. Not so much. Here is what mom and I did for 2 days:
1. Sand doors and frame (using electric sander)
2. Use liquid sandpaper to wipe down all doors and drawers (also called deglosser)
3. Latex primer - Benjamin Moore Advance Water Alkyd Primer - tinted to "Distant Gray" - this is when we realized that our method was not working. (Due to my intense frustration, I took no pictures of this process.) Here's what happened, in words: not only was the grain of the wood showing through, but it was showing through yellowed. Yuck and yikes. And no amount of latex primer would cover it up. We tried a stain-blocking latex primer, and it still didn't work. There are several reasons why our method failed us. First of all, the areas that we didn't degloss (because we plum forgot) were especially stain-happy. However, even the doors we had deglossed were riddled with stains. The bottom line is that a latex primer does not cover stains. After 3 coats of latex primer on many of the surfaces, I crawled back to Benjamin Moore and admitted that I needed to purchase the oil-based primer. They kindly obliged and even gave us a new process to try.
 SOOOOOOO.......this is the final process we used to paint the kitchen cabinets. Thankfully we broke the space into two areas - the island and the desk were part A and the rest of the cabinets were part B. So the only space that we painted a gazillion times was part A.
1. Remove all doors and drawers (we kept the drawer fronts connected to the drawers - it made it tremendously simple to paint the drawer fronts)
2. Remove hinges and pulls (we later decided to purchase new hinges and paint the pulls)
3. Liquid sandpaper (deglosser) - after listening to the advice of my new Benjamin Moore besties, we opted not to sand part B of our kitchen. I was nervous about it at first, but not only did it remove a step, but the deglosser really did function as liquid sandpaper. We used paper towels to degloss every surface. It's important to note that the deglosser "opens" the grain of the wood and allows the grain to accept a primer, so the "window of openness" is relatively short - 3-4 hours at most.
4. Oil-based primer - Benjamin Moore Cover Stain Primer - we probably should have done 2 coats, but we only did 1.
5. Latex paint - Benjamin Moore Advance Water Alkyd Satin in "Distant Gray." Paint one side of the doors, paint the frame, flip the doors and paint the other side. We completed this process 3 times.
6. Cure, cure, cure, cure, cure.
7. Paint pulls - we used Rustoleum spray paint in "Hammered Silver" - Daniel sanded and washed each pull and them gave each 2 coats of the spray paint. After allowing the pulls to cure overnight, we reattached them to their respective doors and drawers.
 After allowing the recommended 72 hours to dry, we reinstalled everything. If you look close at the picture below, you can see that we scraped about 4 inches of the popcorn around the top of the desk so we could adequately paint. We will eventually scrape all the nasty popcorn, but for now, we scraped only where necessary.
 Take-aways:

Whew, that's it! Total time needed to complete - 2 weeks (including curing time). The project is not for haters of messes and/or painting, but if you can dedicate a handful of hours each day to painting, it will be worth it. I never would have attempted the project during the school year. Thankful I did it, thankful it's done. Ha.
And just to keep it real, here is what our kitchen looked like during the process:
 Oh my.
 It was a long two weeks. Lots of eating out.
 Stop by tomorrow for a few decorative updates! Happy painting!

1. Sand doors and frame (using electric sander)
2. Use liquid sandpaper to wipe down all doors and drawers (also called deglosser)
3. Latex primer - Benjamin Moore Advance Water Alkyd Primer - tinted to "Distant Gray" - this is when we realized that our method was not working. (Due to my intense frustration, I took no pictures of this process.) Here's what happened, in words: not only was the grain of the wood showing through, but it was showing through yellowed. Yuck and yikes. And no amount of latex primer would cover it up. We tried a stain-blocking latex primer, and it still didn't work. There are several reasons why our method failed us. First of all, the areas that we didn't degloss (because we plum forgot) were especially stain-happy. However, even the doors we had deglossed were riddled with stains. The bottom line is that a latex primer does not cover stains. After 3 coats of latex primer on many of the surfaces, I crawled back to Benjamin Moore and admitted that I needed to purchase the oil-based primer. They kindly obliged and even gave us a new process to try.

1. Remove all doors and drawers (we kept the drawer fronts connected to the drawers - it made it tremendously simple to paint the drawer fronts)
2. Remove hinges and pulls (we later decided to purchase new hinges and paint the pulls)
3. Liquid sandpaper (deglosser) - after listening to the advice of my new Benjamin Moore besties, we opted not to sand part B of our kitchen. I was nervous about it at first, but not only did it remove a step, but the deglosser really did function as liquid sandpaper. We used paper towels to degloss every surface. It's important to note that the deglosser "opens" the grain of the wood and allows the grain to accept a primer, so the "window of openness" is relatively short - 3-4 hours at most.
4. Oil-based primer - Benjamin Moore Cover Stain Primer - we probably should have done 2 coats, but we only did 1.
5. Latex paint - Benjamin Moore Advance Water Alkyd Satin in "Distant Gray." Paint one side of the doors, paint the frame, flip the doors and paint the other side. We completed this process 3 times.
6. Cure, cure, cure, cure, cure.
7. Paint pulls - we used Rustoleum spray paint in "Hammered Silver" - Daniel sanded and washed each pull and them gave each 2 coats of the spray paint. After allowing the pulls to cure overnight, we reattached them to their respective doors and drawers.


- Do your research, but recognize that your plan might fail.
- What worked for someone may not work for you. Your process should really vary depending on your cabinets. When I painted the vanity in my bathroom earlier this summer, I didn't run into any of the issues that I did when painting the kitchen cabinets.
 | ||
| Downstairs bathroom vanity |
- Oil-based paint is smelling and sticky, but it does work. Just buy a few cheap brushes and throw them away post-painting.
- Don't cut any corners - if you think it needs another coat, give it another coat. It will pay off in the long-run.
- Allow plenty of time to cure. You'll kick yourself if you reinstall only to find out you bumped a door while installing.

Whew, that's it! Total time needed to complete - 2 weeks (including curing time). The project is not for haters of messes and/or painting, but if you can dedicate a handful of hours each day to painting, it will be worth it. I never would have attempted the project during the school year. Thankful I did it, thankful it's done. Ha.
And just to keep it real, here is what our kitchen looked like during the process:


July 24, 2012
It's DONE!!!!!
Almost.
There are perhaps 3 things left to do before I can fully admit that the kitchen is finished (for now), but I just can't wait any longer. We're SO pleased with the results. And so sleepy.
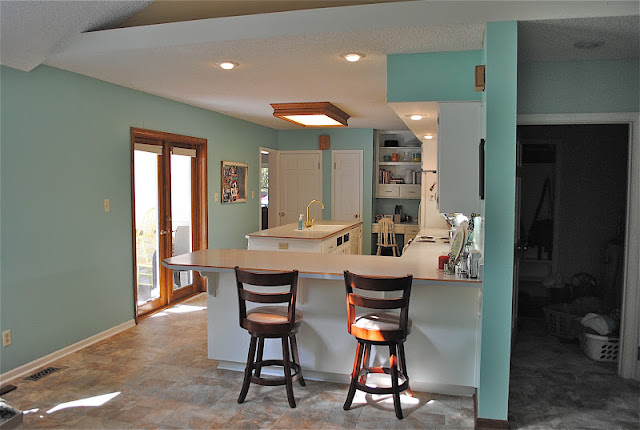
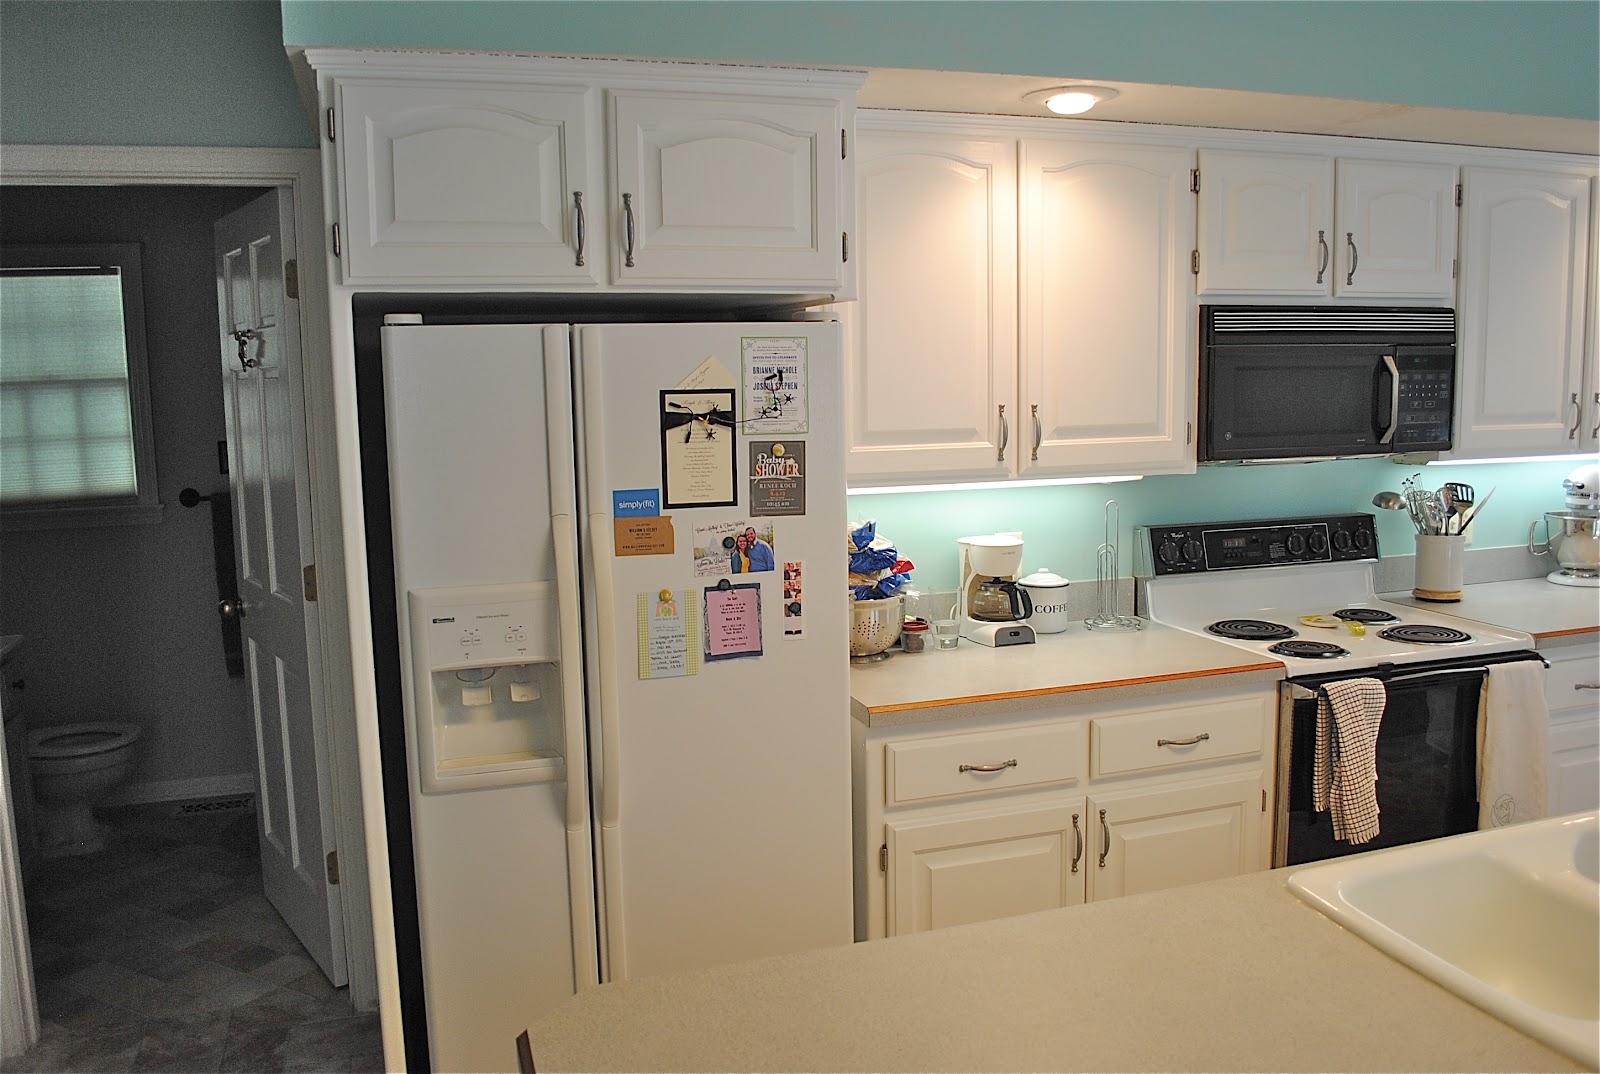
But before I show you the dramatic results, here is where we began. And when I say "began," I mean before we even moved in.
 Holy honey oak!! (As I've mentioned before, honey oak is not the worst thing on the planet...but it is simply not our style.)
 It's everywhere.
 Seven months of planning later, here's the happiness that greets us every day.
 Crisp, clean, lovely, white. (Ignore the almond outlet covers. Someday...)
 So bright and chipper!
 And we LOVE how it looks next to the aqua walls. Chills.
 Another view. (Ignore the beast of a light fixture and the dark doors. Another day...)
 Glass doors still need another coat of paint downstairs, so for now, we're rocking the open cabinets look.
 Aaaaaand we still need to re-install the little doors below the sink. Those suckers are obnoxious. Not that I spent any longer than 30 seconds looking at them before deciding that huzz needed to complete the removal task.

 Now for a few deets. We didn't purchase new hardware. Even if we had scored a killer deal on hardware (like $2 or $2.50 a pop), we still would have spent nearly $150 or $200 on hardware. Not awesome. So we painted it. Perhaps I'll explain someday our love of all things Rustoleum. Seriously. For $14 we had all new hardware. Awesome.
 We did, on the other hand, purchase new hinges (mainly because we realized painting the hinges would result in extreme anger from yours truly due to the continual scrape of paint every time a door was opened). We felt like we had two choices: (1) not order new hinges and eat out for every meal during the remainder of our tenure at our abode OR (2) purchase new hinges. I think you know where this is going.
Initially, we thought hinges were going to run us $7 each. Yikes! No fun. (Especially no fun considering we have 52 hinges. Vomit.) But Dansy, in his infinite knowledge of the interwebz, scored 54 hinges (accidentally ordered 2 extra) for $117 (including tax and shipping). And a great shout was heard from Birchwood Lane. !!!!!!!!! And we're daaaaang pleased. And I reorganized my baking cabinet. Score.

And, just so you have the full effect of the brightness of this room (and our new couch!), here is where we log a solid number of hours. A great deal of naps have been had here. And all are happy.
 How about a few numbers? Dad, you're going to love this.
Hours spent on project: over 100 (it is nauseating calculating any higher)
Painting helpers: 3 (Special shout-out to moms for logging countless hours priming - now that is a good story. I promise I'll tell you soon. And thanks to Cheri who drove from Wichita to spend a day off getting paint in her hair and hearing me complain about the mess I got myself into. And many thanks to Dans for letting me go through with this astronomically larger than life project and for doing the things I didn't want to do.)
Miscellaneous helpers: 3 (Dad, thanks for loaning us painting equipment. Brett, thanks for letting us borrow your sander for far too long. And Tammy, thanks for offering to feed us over and over again. You guys are all great.)
Cost:
Hardware paint: $14
Hinges: $117
Liquid sandpaper (aka: my new bestie): $15
Primer: $65 (latex) + $39 (oil-based)
Paint: $100 (we used a little over 1 gallon)
Brushes, rollers, miscellaneous supplies: $50
Total: $400
We could have saved close to $100 had I not thought that I knew more than the pros and decided to prime with latex paint. Silly me. The good news is that I have a few more painting projects up my sleeve, and now I had loads of extra primer. It all works out in the end.
Hinges: 52
Pulls: 38
Door fronts: 26
Total coats of paint per surface: 4
Trips to Benjamin Moore over a 3 day period: 12 (I'm not even kidding.)
Strands of hair still covered in oil-based paint: 5
So even though it's not 100% finished, we're happy. Really happy. Would we do it again? .........Yes. But we would definitely listen to the pros. Ha. Check back later this week for the products we used and tales of the process.
Now I'm going to go take a nap.
There are perhaps 3 things left to do before I can fully admit that the kitchen is finished (for now), but I just can't wait any longer. We're SO pleased with the results. And so sleepy.
But before I show you the dramatic results, here is where we began. And when I say "began," I mean before we even moved in.


Initially, we thought hinges were going to run us $7 each. Yikes! No fun. (Especially no fun considering we have 52 hinges. Vomit.) But Dansy, in his infinite knowledge of the interwebz, scored 54 hinges (accidentally ordered 2 extra) for $117 (including tax and shipping). And a great shout was heard from Birchwood Lane. !!!!!!!!! And we're daaaaang pleased. And I reorganized my baking cabinet. Score.

And, just so you have the full effect of the brightness of this room (and our new couch!), here is where we log a solid number of hours. A great deal of naps have been had here. And all are happy.

Hours spent on project: over 100 (it is nauseating calculating any higher)
Painting helpers: 3 (Special shout-out to moms for logging countless hours priming - now that is a good story. I promise I'll tell you soon. And thanks to Cheri who drove from Wichita to spend a day off getting paint in her hair and hearing me complain about the mess I got myself into. And many thanks to Dans for letting me go through with this astronomically larger than life project and for doing the things I didn't want to do.)
Miscellaneous helpers: 3 (Dad, thanks for loaning us painting equipment. Brett, thanks for letting us borrow your sander for far too long. And Tammy, thanks for offering to feed us over and over again. You guys are all great.)
Cost:
Hardware paint: $14
Hinges: $117
Liquid sandpaper (aka: my new bestie): $15
Primer: $65 (latex) + $39 (oil-based)
Paint: $100 (we used a little over 1 gallon)
Brushes, rollers, miscellaneous supplies: $50
Total: $400
We could have saved close to $100 had I not thought that I knew more than the pros and decided to prime with latex paint. Silly me. The good news is that I have a few more painting projects up my sleeve, and now I had loads of extra primer. It all works out in the end.
Hinges: 52
Pulls: 38
Door fronts: 26
Total coats of paint per surface: 4
Trips to Benjamin Moore over a 3 day period: 12 (I'm not even kidding.)
Strands of hair still covered in oil-based paint: 5
So even though it's not 100% finished, we're happy. Really happy. Would we do it again? .........Yes. But we would definitely listen to the pros. Ha. Check back later this week for the products we used and tales of the process.
Now I'm going to go take a nap.


Subscribe to:
Posts (Atom)